


If you're in a hurry, watch our 2-minute summary video above before diving into the details.
To keep your robot lawn mower delivering that signature, immaculate, and eco-friendly finish, a simple yet vital task is necessary: the regular replacement of your robot mower blades. These small consumables play a monumental role in the quality of your lawn, especially considering the UK's frequently wet grass and risk of corrosion.
Ideally, you should change your robotic mower blades every 4 to 6 weeks during the peak growing season, or immediately upon the first signs of deteriorated cutting quality—which often appear quickly when mowing damp British lawns.
We will guide you step-by-step on how often to change Mammotion robot mower blades and, crucially, how to do this safely and effectively on your Mammotion model, focusing on the quality materials and safety certifications a brand like Mammotion implies.
Part 1. Why Your Robot Lawn Mower Blades Demand Regular Replacement
You might be tempted to see Mammotion robot mower blades replacement as a task you can postpone. After all, they are just small metal pieces, right? In reality, regular blade replacement is fundamental for three key reasons, especially relevant for the typically dense and damp British lawn: lawn health, energy efficiency, and user safety.
Lawn Health (The Secret to a Clean Cut)
A dull blade doesn't cut the grass blade; it tears it. Take a close look at your lawn: if the tips are frayed, white, or brown a few hours after mowing, it's a sure sign of a blunt blade. These rough "wounds" leave the grass vulnerable to disease and pests—a greater risk in damp conditions. Regular replacement ensures a clean, sharp cut, which is essential for a dense, healthy lawn.
Energy Efficiency and Motor Longevity
When the robotic lawn mower blades are dull, the motor must work significantly harder to perform the same task. This dramatically increases energy consumption, strains the motor, and can indirectly answer the question of how long do robot mower blades last. By changing your blades promptly, you optimise battery life, reduce the robot's workload, and extend the life of the cutting motor.
Safety and Protection of the Cutting Disc (Considering UK Weather)
A heavily worn or cracked blade can snap and be thrown. While robotic mower blades are small and light, this remains a safety hazard. Furthermore, due to the UK's constant battle with rust and wet conditions, the whole cutting system (the disc, screws, and washers) can face excessive stress if wear is too high, potentially requiring a more expensive repair than a simple blade replacement.
Mammotion, and similar high-quality brands you rely on, use advanced cutting discs where the blades pivot and retract slightly upon encountering a tough obstacle (stone, root). If blades are too blunt, they resist this pivot action, transferring the shock directly to the motor. This makes preventive replacement even more vital, demonstrating the value you place on quality materials and engineering.
Part 2. How Often Should I Change Robot Mower Blades? Key Signs of Wear
The question of how often to change Mammotion robot mower blades doesn't have a fixed answer (4 to 6 weeks is an average estimate). Replacement interval is heavily dependent on your lawn's condition, mowing frequency, and the presence of debris. It is crucial to learn to recognise the visual and acoustic signs of wear.
Visual Signs on the Lawn
- "Chewed" Grass: Instead of a crisp cut, the grass appears frayed or has grey-whitish tips. This is the most reliable indicator of a blunt blade.
- Irregular Patches: The robot leaves higher patches of grass, indicating the blade is no longer sharp enough to cut the grass uniformly across the entire disc width, particularly challenging with wet grass.
Signs on the Robot Mower
Visibly Dull, Chipped, or Bent Blades: Inspect the edges of your robot mower blades. If they are rounded, chipped, or have a significant amount of rust, it’s time for a change.
- Increased Cutting Noise: If your robot suddenly emits an unusual grinding or "clack-clack" noise while cutting, it may mean the blades are unbalanced, heavily worn, or a screw is loose.
- Reduced Battery Life: As mentioned, a blunt blade forces the motor to work harder. If you notice your robot returning to its charging station more frequently than usual (without changes in weather or grass height), this points to excessive resistance due to blade condition.
Pro Tip to Extend Blade Life: Most robotic mower blades are reversible! You can use both sides of the blade before you need to discard it. This can potentially extend their lifespan up to 8 weeks. Just ensure you clean the entire assembly thoroughly when reversing them.
Part 3. Safety First: Tools for Robot Mower Blades Replacement
Before undertaking your Mammotion robot mower blades replacement, safety is paramount. You are working on a machine with sharp components and a powerful motor. Good preparation ensures your safety and prevents damage to your Mammotion's sensitive parts.
| Tool | Description and Role | Safety Note |
|---|---|---|
| Work Gloves | Mandatory for protecting your hands from the very sharp edges of both new and used blades. | Always wear them. |
| Phillips Screwdriver (or Tool Provided) | Necessary for removing the screws holding the blades to the disc. | Do not use an electric drill/driver—this can damage screw heads or, worse, the cutting plate. |
| Stiff Brush or Cloth | For cleaning old grass debris, soil, and dirt from around the cutting disc. | Cleaning is crucial to prevent the new blades from being unbalanced. |
| New Blades and Replacement Screws | Only use robot lawn mower blades and screws specific to your Mammotion model (or certified compatibles). | NEVER use the old screws with new blades—they are single-use. |
| Soft Material (Mat or Blanket) | To turn the robot over without scratching the chassis, vision sensor, or other components. | Ensure the material is clean to avoid introducing dirt. |
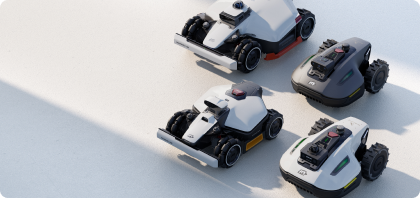
Part 4. How to Change Robot Mower Blades on Your Mammotion(YUKA/LUBA series)—Detailed Steps
Replacing your Mammotion robotic mower blades is a simple procedure that only takes a few minutes.
1. Stop the Robot
Press and hold the power button to completely switch off the robot mower.
2. Maximum Safety
Ensure the machine is switched off and absolutely remove the safety key (if your model has one). This cuts all power to the cutting motor, a vital safety step that UK users prioritise.
3. Position the Robot
Turn your Mammotion mower upside down onto a soft material (mat or blanket). Be careful not to damage the vision module or bumper sensors.
4. Personal Protection
Put on your work gloves to protect your hands from the sharp edges.
5. Remove Used Blades and Screws
Using the screwdriver, remove the screws (one by one) holding the old blades to the disc. Use a manual screwdriver to avoid injury or damage to the screw thread.
6. Thorough Cleaning
Clean the cutting disc area. Remove all debris, especially dried or wet grass mulch, from around the screw holes. This guarantees the new blade will spin freely.
7. Installation of New Blades and Screws
Take the new screws and new robot mower blades. Attach each new blade with a new screw. Ensure the blade is free to pivot on its screw. It must move easily.
8. Check for Free Rotation
Verify that every installed blade rotates freely around its screw without effort. This is the sign of correct assembly.
9. Washer Management (Crucial UK Tip)
If your mower uses washers, check carefully if any old washers (or parts of washers) are stuck to the disc or have fallen off. Especially with wet grass and sticky conditions, old washers can remain stuck. You must ensure you remove all of them before fitting the new ones, as an accumulation could prevent the new blade from pivoting correctly.
Part 5. Common Errors to Avoid When Performing Robot Mower Blades Replacement
Even though the replacement process is straightforward, some common errors can compromise your robot's efficiency, safety, or lifespan.
| Common Error | Negative Consequence | How to Avoid It? |
|---|---|---|
| Reusing Old Screws | The screw loses its thread lock capacity and risks coming loose during mowing. Risk of blade ejection. | Always use the new screws provided in the blade kit (single-use design). |
| Forgetting to Clean the Disc | Dried grass debris creates imbalance and resistance, increasing noise, vibration, and motor load, especially when mixed with rust. | Clean the cutting disc with a brush. Ensure new blades are secured to a clean surface. |
| Using an Electric Driver | Risk of damaging the screw head, the disc thread, or overtightening the screw, preventing the blade from pivoting. | Only use a manual screwdriver for correct torque (the blade must be able to pivot). |
| Forgetting the Safety Key | The robot can accidentally start, causing serious injury. Safety certification compliance is key. | Always switch off and remove the safety key before turning the unit over. |
| Attempting to Sharpen Old Blades | The blade becomes unbalanced and too thin/fragile, increasing the risk of breakage and projection at high speed. | Do not sharpen robot mower blades—their low cost doesn't justify the risk. Simply replace them. |
Part 6. Can You Sharpen Robot Mower Blades or Extend Their Life?
While the question of can you sharpen robot mower blades is technically possible for rigid-bar blades, for the thin, disposable robot mower blades used by Mammotion, it is not recommended due to the danger of creating an imbalance. However, you can significantly extend their life:
- Mow More Often, Cut Less: The most damaging cut is one that slices through a large amount of thick, high grass. Regular mowing reduces the workload on the blade.
- Clean the Underside Regularly: A weekly wipe or brush-down of the underside prevents the buildup of moist mulch and debris, which adds friction and can stick foreign objects to the blades.
- Prepare the Mowing Area: Before running your robot, check your garden. Collect all objects that could damage the robot lawn mower blades: stones, small branches, or dropped fruit. The fewer obstacles the blade encounters, the sharper it remains.
- Use Both Sides of the Blade: This is the easiest way to double their lifespan. When you notice the first signs of cut wear, simply turn the blade over and use the unused edge.
| Action to Prolong Life | Recommended Frequency | UK Benefit |
|---|---|---|
| Invert / Reverse the Blades | At the first signs of wear (approx. 4–6 weeks) | Doubles lifespan, reduces waste, and tackles tough, wet grass. |
| Clean the Cutting Plate | Weekly | Reduces friction and motor load. Keeps corrosion at bay. |
| Clear Debris | Before each cycle or daily | Protects blade edges against chipping and stops them hitting unseen obstacles. |
| Check Alignment | Once a month | Ensures blades spin without dangerous imbalance. |
Part 7. Identifying Dangerous Robotic Mower Blades
Identifying a dangerous robotic mower blade is not just about cutting quality but primarily about safety. A faulty or damaged blade poses a risk to the robot itself and its environment.
Criteria for Identifying a Dangerous Blade
- Cracks and Fractures: If the blade shows visible cracks or if a corner is broken off, replace it immediately. At high speed, even a micro-crack can lead to the complete disintegration and ejection of the blade.
- Excessive Bending or Deformity: If the blade is permanently bent after hitting a hard object, do not attempt to straighten it. A deformed blade creates a significant weight imbalance, causing excessive vibration on the motor bearing and the chassis assembly.
- Enlarged Screw Hole: If the blade edge looks okay, but the fixing hole for the screw is visibly widened by wear, this indicates excessive movement between the blade and the screw. The blade is then at risk of not staying fixed at high speed.
When Replacement is Absolutely Mandatory
After a Violent Impact: If the robot mower has hit a large stone or concrete edge, stop the machine and check the blades for micro-cracks or deformation, even if the cutting quality doesn't seem immediately affected.
As Soon as You Hear an Abnormal Vibration: Sound is the robot's "alarm signal." If freshly installed robot mower blades still cause heavy vibration or noise, immediately replace the entire set of blades and screws.
Most manufacturers, including trusted brands like Mammotion, recommend high-quality stainless or carbon steel blade materials, highlighting the quality materials you value. Attempting to "repair" them beyond their intended how long do robot mower blades last design is done at the expense of safety. For these types of blades, preventive replacement is the best maintenance strategy.
Conclusion
As we have detailed, the longevity of your Mammotion robot and the lush quality of your lawn directly depend on the sharpness of these small components. A dull blade tears the grass, overloads the motor, and can even become dangerous if cracked or improperly fixed.
By following these replacement steps for your Mammotion, you will maintain its cutting efficiency, prolong its battery life, and ensure the safety of your garden. Regular maintenance of these robot mower blades is the secret to a consistently perfect lawn.
FAQs
1. Will the notoriously damp British weather increase the chances of my robot mower blades developing rust?
Yes, the UK's frequent dampness and showers significantly heighten the risk of rust on your robot mower blades. To minimise corrosion, always ensure you thoroughly wipe down the cutting deck and blades after a session, or before extended storage, and consider using stainless steel or titanium-coated robotic mower blades for better resilience against our climate.
2. Can I simply wait until my robot lawn mower blades are completely blunt before I change them?
That's highly discouraged. For quality robot mower blades, a noticeable drop in cutting quality is the key indicator for replacement. Continuing to use dull blades not only causes shredded grass tips (which turn white or brown) but also places unnecessary, prolonged strain on the motor and battery of your unit.
3. My robotic mower blades often get clogged with a thick, wet mulch—how do I stop this?
Clogging is very common in the soggy British springtime when grass is nutrient-dense and damp. To prevent a build-up of sticky grass clippings on the deck, try raising your cutting height setting by one notch and always ensure you use a stiff brush to clear the wet residue from the underside immediately after mowing.
4. Once I've changed my robot mower blades, do I need to reset any settings on the machine?
For many modern, premium brands, yes. Several models feature a blade usage timer that tracks the cumulative hours of use for the robot mower blades. To accurately monitor the lifespan of your new set, it is good practice to reset this counter within the app or control panel.
5. If my lawn has a lot of moss, does that affect the wear rate of the robot lawn mower blades?
It does. The moss and thatch commonly found on UK lawns increase the resistance your robot mower blades face—similar to cutting dense, tough grass. This will accelerate blade wear. After scarifying or treating moss, it is always wise to check your blades for any signs of damage or dullness.
6. Why do some robot mower blades replacement kits come with new, longer screws?
Some robot mower blades kits supply slightly longer single-use screws to ensure the blade is securely fastened but can still pivot freely. This pivoting capability is a critical safety mechanism designed to prevent the blade from snapping when it hits a small stone or obstacle, a feature UK buyers often look for as proof of safety certification.
7. Should I remove the robotic mower blades when I put the machine into winter storage?
It's essential to conduct a thorough clean and inspection of the robot mower blades before winter layup. If they are heavily worn or rusty, it's actually better to replace them with a fresh set before storing the machine. This ensures your robot is ready to go at peak performance when the early spring grass growth starts again.