


A pristine, velvet-green lawn starts with more than just a good mower—it begins with a razor-sharp edge. Over time, even the toughest steel blades become dull, leading to ragged grass tips, yellowing lawns, and unnecessary engine strain.
Sharpening your own lawn mower blades is a high-impact DIY skill that saves you money and keeps your grass healthy. In this comprehensive guide, we’ll walk you through the essential tools, safety protocols, and the step-by-step process to restore that factory edge safely and efficiently.
Part 1. Signs Your Mower Blades Are Blunt:When to Change Lawn Mower Blade?
Poor Cutting Quality and Ragged Grass Tips
One of the earliest and most noticeable signs of blunt lawn mower blades is poor cutting quality. Instead of producing clean, even cuts, dull blades tend to tear and shred the grass. After mowing, you may notice ragged or frayed grass tips rather than sharp, straight edges.
This tearing damages the grass tissue, making it harder for your lawn to recover. As a result, the lawn may look uneven or patchy, even if you’ve just finished mowing. If you find yourself going over the same area multiple times to achieve an acceptable result, your mower blades are likely no longer sharp enough.
Yellow or Unhealthy Lawn After Mowing
If your lawn starts turning yellow or brown shortly after mowing, blunt blades may be the hidden culprit. When grass is torn instead of cleanly cut, the damaged edges lose moisture more quickly and become vulnerable to disease and fungal infections.
Over time, this stress weakens the grass and affects overall lawn health. You may notice slower growth, uneven coloring, or an increase in lawn diseases. If your lawn looks healthy before mowing but dull and stressed afterward, it’s a strong indicator that your mower blades need attention.
Increased Vibration and Noise
Another common sign of dull or worn mower blades is increased vibration and noise during operation. As blades lose their sharp edge—or become slightly bent or unbalanced—the mower has to work harder to spin them.
This can lead to noticeable shaking, rattling, or louder-than-usual engine noise. Not only is this uncomfortable to use, but it also places extra strain on the mower’s motor or engine. Persistent vibration should never be ignored, as it can signal blade wear that goes beyond simple dullness.
Longer Mowing Time and Reduced Efficiency
Blunt mower blades significantly reduce mowing efficiency. When blades are sharp, grass is cut cleanly in a single pass. When they’re dull, the mower struggles, requiring slower movement and repeated passes over the same area.
You may find that mowing takes noticeably longer than it used to, even on familiar sections of your lawn. For electric or battery-powered mowers, this inefficiency can also lead to faster battery drain. If your usual mowing routine suddenly feels more time-consuming, dull blades are often to blame.
For most homeowners, lawn mower blades should be sharpened every 20 to 25 hours of use, or approximately once per mowing season. This guideline works well for typical residential lawns under normal conditions.
However, sharpening frequency can vary depending on how often you mow, the condition of your lawn, and the type of mower you use. Lawns with sandy soil, uneven terrain, or hidden debris can dull blades more quickly. Similarly, frequent mowing or cutting wet and overgrown grass may require more frequent sharpening.
Rather than relying solely on time intervals, it’s best to pay attention to performance. If grass tips appear ragged, mowing takes longer, or the mower produces more vibration or noise, it’s a clear sign that the blades need sharpening—regardless of how long they’ve been in use.
Part 2. The Essential Tool Kit: Everything You Need in Your Shed

Before sharpening your lawn mower blades, it’s important to gather the right tools. Having everything ready not only makes the process smoother but also helps ensure safety and proper results.
1. Safety Gear (Must-Have)
These items protect you from cuts and flying debris during blade removal and sharpening.
- Work gloves – Protect your hands from sharp blade edges
- Safety goggles – Prevent metal filings or debris from getting into your eyes
2. Wrench or Socket Set
You’ll need a wrench or socket set to loosen and remove the bolt securing the mower blade.
- Check your mower manual for the correct bolt size
- A socket wrench often provides better leverage than a standard wrench
3. Blade Removal Support (Simple but Useful)
To keep the blade from spinning while loosening the bolt: A wooden block or piece of scrap wood – Placed between the blade and mower deck
4. Sharpening Tool (Choose One)
There are several ways to sharpen mower blades. Choose the option that best fits your experience level.
- Metal file – Budget-friendly and beginner-safe
- Bench grinder – Fast and efficient for experienced users
- Angle grinder – Powerful, but requires steady control
5. Blade Balancer (Recommended)
After sharpening, it’s important to ensure the blade is properly balanced: a blade balancer or a simple nail mounted on a wall.
6. Cleaning Supplies
Before sharpening, clean the blade to get accurate results.
- Wire brush – Removes grass buildup and rust
- Rag or cloth – For wiping down the blade
7. Torque Wrench (Optional but Ideal)
For reinstalling the blade: Torque wrench – Ensures the blade bolt is tightened to the correct specification
8. Optional Extras (Nice to Have)
These aren’t required, but they make the job easier:
- Penetrating oil – Helps loosen stubborn bolts
- Workbench or vise – Provides a stable surface for sharpening
Part 3. Safety First: Crucial Pre-Sharpening Checks and Protocols
Before you start sharpening your lawn mower blades, safety must be your top priority. Taking the time to perform essential pre-sharpening checks not only protects you from injury but also ensures your mower remains in good working condition. Here’s everything you need to do before picking up a file, grinder, or any other sharpening tool.
1. Disconnect All Power Sources
The most important step is to make sure the mower cannot accidentally start while you’re working on it.
- Gas-powered mowers: Always remove the spark plug wire to prevent accidental ignition.
- Electric mowers: Unplug the mower from the power outlet.
- Battery-powered mowers: Remove the battery completely.
Never attempt to sharpen the blades without disconnecting all power sources—this is the simplest and most effective way to prevent serious accidents.
2. Position the Mower Safely
- Lay the mower on a flat, stable surface.
- For gas mowers, tilt the mower with the air filter and carburetor facing up to avoid fuel leakage.
- Make sure the mower is completely cool before handling the blade.
Proper positioning keeps both you and your equipment safe throughout the process.
3. Wear Proper Protective Gear
Even with the right tools, personal protection is crucial:
- Work gloves: Protect your hands from sharp blade edges.
- Safety goggles: Shield your eyes from metal filings, rust, or debris.
-
Closed-toe shoes: Avoid wearing sandals or flip-flops.
Wearing the correct gear may feel excessive for a quick job, but it significantly reduces the risk of injury.
4. Inspect the Blade Before Sharpening
Before sharpening, check the blade carefully for any structural issues:
- Cracks or deep chips – if present, replace the blade instead of sharpening.
- Severe bends or warping – do not attempt to straighten or sharpen.
-
Excessive wear – if the blade is too thin or uneven, replacement is safer.
Only blades with minor dullness and no structural damage should be sharpened.
5. Prepare a Safe Work Area
A clean and organized workspace can prevent accidents:
- Ensure the ground is level and free of clutter.
- Make sure there’s ample lighting to see the blade clearly.
- Keep children and pets away from the area.
-
Lay out all tools within reach, but away from the mower deck.
A well-prepared environment reduces distractions and minimizes the chance of slipping or knocking over tools.
Part 4. How to Sharpen a Lawn Mower Blade: A Step-by-Step Guide
Sharpening your lawn mower blades may seem intimidating at first, but with the right tools and proper safety precautions, it’s a straightforward process. Follow this step-by-step guide to restore your blades to optimal cutting performance.
Step 1: Gather Your Tools and Safety Gear
Before starting, make sure you have everything ready:
- Safety gloves and goggles
- Wrench or socket set
- Blade removal support (wood block)
- Sharpening tool (file, bench grinder, or angle grinder)
- Wire brush and rag for cleaning
- Blade balancer
Having all your tools organized will make the process smoother and safer.
Step 2: Disconnect Power and Secure the Mower
- Gas mowers: Disconnect the spark plug wire.
- Electric mowers: Unplug the power cord.
- Battery mowers: Remove the battery.
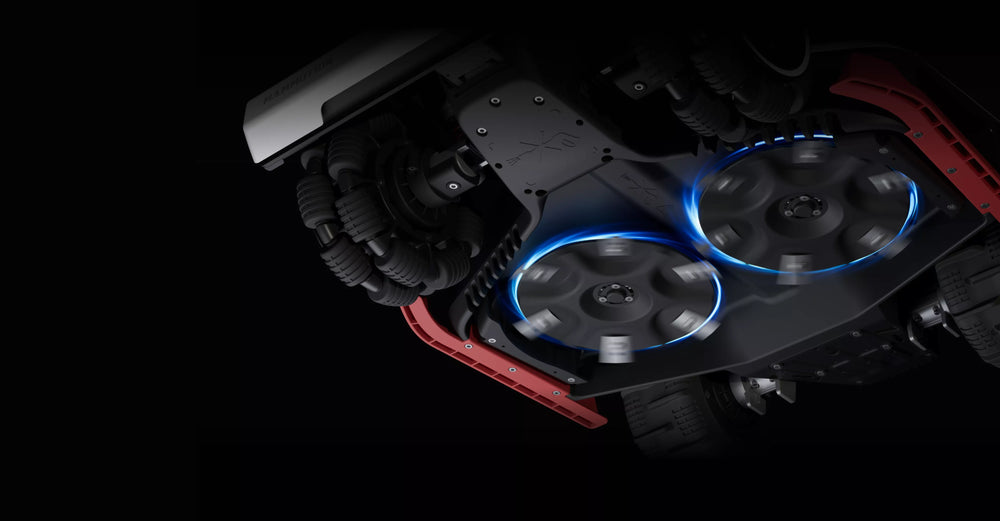
- Robot lawn mowers: Ensure the machine is powered down and the safety key is completely removed (if applicable, like Mammotion robot lawn mower). This isolation step ensures the cutting motor cannot be engaged.
Place the mower on a flat surface, ensuring the carburetor and air filter are facing up for gas mowers. Use a wooden block or similar support to prevent the blade from spinning.
This ensures the blade is stable while you work and prevents accidental starts.
Step 3: Remove the Blade
- Use the appropriate wrench or socket to loosen the bolt securing the blade.
- Carefully slide the blade off the mower deck.
- Keep track of the blade’s orientation so you can reinstall it in the same direction.
-
Inspect the blade for cracks, severe bends, or excessive wear. Replace if necessary.
Step 4: Clean the Blade
- Use a wire brush to remove grass buildup, dirt, and rust.
-
Wipe the blade with a cloth to ensure a clean surface for sharpening.
A clean blade is easier to sharpen and produces a smoother edge.
Step 5: Sharpen the Blade
Option 1: Using a Metal File (Beginner-Friendly)
- Secure the blade in a vice or on a stable surface.
- Hold the file at the same angle as the existing bevel (usually around 30°).
- Push the file in one direction along the edge, applying even pressure.
-
Repeat until the edge is sharp, then move to the other side if needed.
Option 2: Using a Bench Grinder (Faster)
- Turn on the grinder and gently press the blade against the spinning wheel.
- Maintain the original bevel angle.
-
Avoid overheating the blade by taking short passes and letting it cool between strokes.
Option 3: Using an Angle Grinder (Powerful)
- Hold the blade firmly and follow the same bevel angle.
- Work slowly to maintain control and prevent removing too much metal.
-
Always wear gloves and goggles to protect from sparks and debris.
Step 6: Check Blade Balance
- Place the sharpened blade on a blade balancer or hang it on a nail.
- A balanced blade should stay horizontal.
-
If one side dips, remove a small amount of metal from that side and recheck.
Properly balanced blades reduce vibration and prolong the mower’s life.
Step 7: Reinstall the Blade
- Position the blade in the same orientation as it was removed.
- Tighten the bolt using a wrench or torque wrench according to the manufacturer's specifications.
-
Ensure the blade is secure but not over-tightened.
Step 8: Final Safety Check
- Reconnect the spark plug, battery, or power cord.
- Double-check that all tools are cleared from the work area.
- Start the mower briefly (on a safe patch of grass) to ensure everything runs smoothly.
Part 5. Finding the Right Angle: How to Maintain the Factory Edge

Maintaining the factory edge of your lawn mower blade is crucial for efficient cutting and a healthy lawn. Here’s how to do it right:
1. Know the Original Bevel Angle
- Most mower blades are designed with a bevel angle between 25° and 35°.
- Maintaining this angle ensures optimal cutting performance and prevents blade damage.
- Before sharpening, observe the existing edge carefully or refer to the manufacturer’s specifications.
2. Use a Consistent Angle While Sharpening
- Metal file: Hold the file at the same angle as the original bevel, and use smooth, even strokes.
- Bench grinder: Keep the blade steady against the wheel; if possible, use an angle guide.
- Angle grinder: Move slowly along the edge, keeping the original angle consistent to avoid removing too much metal.
Consistency is key. Uneven sharpening can reduce cutting efficiency and create vibration during mowing.
3. Check the Edge Frequently
- After several passes, pause and inspect the blade.
- Make sure the bevel is uniform across the entire edge.
- Correct any deviations before finishing the other side.
4. Avoid Common Mistakes
- Sharpening at too steep an angle → blade becomes thin and fragile
- Sharpening at too shallow an angle → cutting efficiency drops
- Unequal angles on each side → unbalanced blade, causing mower vibration
It’s better to do several light passes than try to sharpen aggressively in one go.
Part 6. Don’t Skip This: How to Balance Your Blades to Protect Your Motor
Even a perfectly sharpened blade can cause problems if it’s not balanced. An unbalanced blade creates vibration, which puts unnecessary stress on your mower’s motor, bearings, and bolts, reducing the machine’s lifespan. Here’s how to make sure your blades are perfectly balanced before reinstalling.
1. Check Blade Balance
Using a Blade Balancer (Recommended):
- Place the sharpened blade on a blade balancer.
- The blade should remain horizontal.
-
If one side dips, it indicates more metal needs to be removed from that side.
DIY Method:
- Hang the blade horizontally on a nail or screwdriver.
-
Observe which side dips and lightly file that side until the blade stays level.
2. Adjust and Recheck
- Remove small amounts of metal at a time—never try to fix it in one pass.
- After each adjustment, check balance again.
-
Repeat until the blade stays perfectly horizontal.
3. Tips for Maintaining Balance
- Maintain the same bevel angle while filing the heavier side.
- Avoid over-sharpening one side—this can create imbalance in the other direction.
- Always check both sides after each sharpening session.
4. Reinstall with Confidence
- Once balanced, reinstall the blade securely.
- Tighten bolts to the manufacturer’s recommended torque.
- Run the mower briefly to ensure smooth operation and minimal vibration.
Part 7. Sharpen vs Replace: Making the Right Choice
Knowing whether to sharpen or replace your lawn mower blade is crucial for safety and performance. Over-sharpening or using a damaged blade can harm your mower and create uneven cuts. Here’s how to decide:
Key Factors to Consider
Cracks or Splits: Any visible cracks mean replacement is necessary.
Blade Thickness: If repeated sharpening has thinned the metal, replace it.
Bends or Warping: Bent or twisted blades cannot be safely sharpened.
Chips or Missing Pieces: Large nicks or missing chunks require replacement.
Minor Dullness: Slightly dull edges can be sharpened safely.
Small Nicks: Minor nicks or damage that can be smoothed with a file are fine to sharpen.
Sharpen vs Replace Comparison Table
|
Condition / Issue |
Sharpen Blade |
Replace Blade |
Notes |
|
Slightly dull edge |
✅ |
❌ |
Regular maintenance; restores cutting efficiency |
|
Minor nicks or burrs |
✅ |
❌ |
Can smooth with file or grinder |
|
Cracks / splits |
❌ |
✅ |
Blade could break; safety risk |
|
Severe bends / warping |
❌ |
✅ |
Cannot balance; sharp edges unsafe |
|
Missing chunks or large chips |
❌ |
✅ |
Compromises cutting performance |
|
Excessively thin from repeated sharpening |
❌ |
✅ |
Metal too weak; risk of breakage |
|
Blade still thick and structurally sound |
✅ |
❌ |
Sharpening will prolong life |
When in doubt, replacing a blade is safer than over-sharpening. Safety always comes first, and a properly replaced blade ensures even cutting and protects your mower.
Part 8. DIY Sharpening vs. Professional Servicing: Which Is Best for Your Garden?
When deciding whether to sharpen your lawn mower blades yourself or rely on a professional service, consider the following factors:
|
Factor |
DIY Sharpening |
Professional Servicing |
Notes |
|
Skill & Experience |
✅ Good for experienced DIYers |
✅ Professionals handle all skill levels |
If you’re new, mistakes can happen with DIY |
|
Tools & Equipment |
⚠ Requires file, grinder, balancer, safety gear |
✅ All tools provided |
DIY may require upfront investment |
|
Time & Convenience |
⚠ Time-consuming (disassemble, clean, sharpen, balance) |
✅ Quick and hassle-free |
Professionals save effort and reduce errors |
|
Cost |
✅ Low long-term cost |
⚠ Pay per service |
DIY has upfront tool costs, pro service has ongoing fees |
|
Safety Risk |
⚠ Higher risk of cuts, blade breakage, vibration |
✅ Safer, handled by trained staff |
Safety precautions crucial for DIY |
|
Blade Condition |
✅ Fine for slightly dull blades |
✅ Better for bent, cracked, or heavily worn blades |
Professionals handle severe damage better |
|
Frequency of Maintenance |
✅ Good for frequent light touch-ups |
✅ Ideal for occasional deep maintenance |
DIY suits regular minor sharpening |
|
Cutting Performance |
⚠ Can be inconsistent if skill or tools aren’t optimal |
✅ Uniform, precise sharpening |
Professionals ensure balanced, perfect cuts |
Quick Takeaway
DIY Sharpening: Best for regular, minor maintenance if you have the right tools and experience. Economical but requires care and attention to safety.
Professional Servicing: Ideal for damaged blades, infrequent maintenance, or users who want guaranteed balance and precision. Safer and faster, but costs more per service.
Conclusion
Proper care of your lawn mower blades is key to a healthy lawn and a long-lasting mower. Knowing how do you sharpen lawnmower blades correctly, keeping them balanced, and recognizing when to replace them ensures efficient cutting, safety, and consistent performance. Whether you choose DIY sharpening or professional servicing, regular maintenance is the key to a better mowing experience.
Frequently Asked Questions
1. How much does professional lawn mower blade sharpening cost in the UK?
Typically between £10 and £25 for a single blade. While a standalone sharpen and balance is affordable, many UK homeowners opt for a full petrol lawnmower service, which costs between £80 and £150. Local garden machinery dealers across the UK usually provide these services with a quick turnaround during the spring.
2. Can I sharpen the blades on a cylinder mower myself?
No, cylinder mowers require professional regrinding. Unlike standard rotary mowers, cylinder mower sharpening involves a precise "scissor-cut" action between the spiral blades and the bottom blade. This requires specialized grinding machinery or a process called "backlapping" with abrasive paste to ensure a clean cut for fine British lawns.
3. Does the damp UK weather affect how often I should sharpen?
Yes, mowing wet grass dulls blades faster and promotes rust. The high moisture levels in the UK cause grass to clump, which increases friction and acid corrosion on the steel. You should inspect your lawnmower blades for rust more frequently and consider sharpening every 15–20 hours of use during a wet summer.
4. Is it illegal to dispose of old mower blades in general household waste?
Yes, they should be taken to a local Household Waste Recycling Centre (HWRC). Because they are scrap metal and sharp, they pose a risk to waste collection staff. Most UK recycling centres have dedicated bins for scrap metal where old, worn-out mower blades can be safely processed.
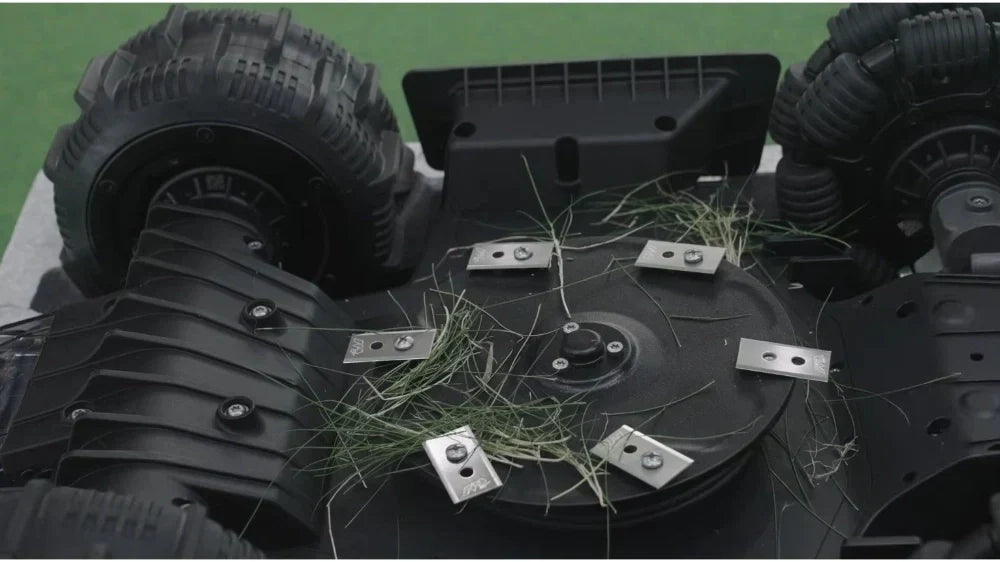
5. Should I sharpen or replace robotic mower blades?
You should replace them, but they are not designed for sharpening. These machines use small, razor-like blades that are very thin. Attempting robotic mower blade sharpening often leads to an imbalance that can damage the expensive cutting motor. In the UK, a pack of replacement blades is inexpensive and much safer.


