


Establishing a lush, resilient lawn in the United Kingdom requires more than just high-quality seed; it demands precision in timing and a professional approach to soil preparation. Given the increasingly unpredictable weather patterns observed across Europe and the UK
Whether you are restoring a weary garden after a harsh winter or starting a landscape project from scratch, this guide provides an industry-standard framework.
We will move beyond the basics to explore the technical nuances of germination temperatures, the benefits of autumn versus spring sowing, and the practical steps necessary to achieve a "golf-green" finish that can withstand the demands of a modern British summer.
Part 1. Timing is Everything: When Is the Best Time to Sow Grass Seed in the UK?
In the UK, the success of your lawn is dictated more by soil conditions than by the date on the calendar. To achieve professional-grade results, one must align the sowing schedule with the biological requirements of the seed—specifically, consistent moisture and stable warmth.
Spring vs Autumn Comparison
While grass seed can be sown in both windows, the choice often depends on your specific site conditions and the primary challenges of the season.
|
Feature |
Spring Sowing (Late March – May) |
Autumn Sowing (Late August – October) |
|
Primary Benefit |
Rapid growth fueled by increasing daylight hours. |
Warm soil and consistent natural rainfall. |
|
Main Challenge |
Potential for "late frosts" or early summer droughts. |
Risk of early frosts or waterlogging in late October. |
|
Weed Competition |
High; many weed seeds germinate in spring. |
Low; most annual weeds are dormant. |
|
Best For |
Repairing winter damage or "filling in" patches. |
Full lawn renovations and new installations. |
Soil Temperature: The Non-Negotiable Metric
For successful germination, the soil temperature (not the air temperature) must be consistently between 10°C and 15°C.
Professionals use a soil probe to measure temperature at a depth of 5cm to 10cm. If the soil is below 10°C, the seed will remain dormant, leaving it vulnerable to rot, birds, or fungal pathogens. Waiting for a stable five-day average above the 10°C threshold is critical before commencing.
European & Regional Differences
The UK’s maritime climate creates significant regional variance that should not be ignored:
- Southern England & Mainland Europe (e.g., France/Benelux): You may find the sowing window opens 2–3 weeks earlier in spring but closes faster due to intense early-summer heat.
- Northern England, Scotland, & Scandinavia: The window is narrower. Soil takes longer to warm in spring, and autumn sowing must be completed by mid-September to ensure the root system is established before the first hard frost.
Month-by-Month Sowing Suitability (UK/Northern Europe)
|
Month |
Suitability |
Professional Verdict |
|
Jan - Feb |
Poor |
Ground is too cold/frozen. Risk of seed rot. |
|
Mar - Apr |
Good |
Excellent for spring renovation, provided soil is >10°C. |
|
May - June |
Moderate |
Good growth, but requires intensive irrigation to prevent drying out. |
|
July - Aug |
Poor |
Too hot/dry for new seeds without professional irrigation systems. |
|
Sept - Oct |
Optimal |
The "Goldilocks" zone: Warm soil + reliable rain. Best results. |
|
Nov - Dec |
Poor |
Too cold; lack of daylight prevents photosynthesis and establishment. |
Part 2. Don't Skip the Prep: How to Prepare Your Lawn for Success
The difference between a patchy garden and a professional lawn lies in the groundwork. In the industry, we consider preparation to be 80% of the project. Cutting corners during this phase will inevitably lead to uneven germination and long-term maintenance headaches.
1. Remove Weeds Thoroughly
For a clean start, you must eliminate existing vegetation. If you are over-seeding, focus on removing broadleaf weeds. If starting from scratch, a "stale seedbed" technique is recommended.
Method
Use a systemic herbicide or manual excavation to remove weeds, including the roots.
Professional Tip
After clearing the area, wait 7–10 days. This allows any dormant weed seeds disturbed during the process to germinate so you can remove them before sowing your expensive grass seed.
2. Select the Right Grass Seed Type
Not all grass is created equal. Your choice should be dictated by the intended use of the lawn and the environmental conditions of your specific region in the UK or Europe.
|
Seed Type |
Best For |
Key Characteristics |
|
Dwarf Perennial Ryegrass |
Family lawns / High traffic |
Extremely hard-wearing, fast establishment, and resilient. |
|
Fine Fescues |
Ornamental / Shady areas |
Slow-growing, elegant thin blades, high drought tolerance. |
|
Medallion/Sports Mix |
Golf greens / Luxury lawns |
High density and a deep green aesthetic; requires more maintenance. |
3. Improve the Soil Structure
Grass thrives in well-drained, nutrient-rich soil. Before sowing, you must assess your soil texture:
- Clay Soils: Common across much of the UK. Incorporate organic matter or sharp sand to improve drainage and prevent waterlogging.
- Sandy Soils: Common in coastal European regions. Add compost or topsoil to improve moisture retention.
- pH Balancing: Aim for a soil pH between 6.0 and 7.0. If your soil is too acidic (common in heathland areas), apply lime; if too alkaline, apply sulphur.
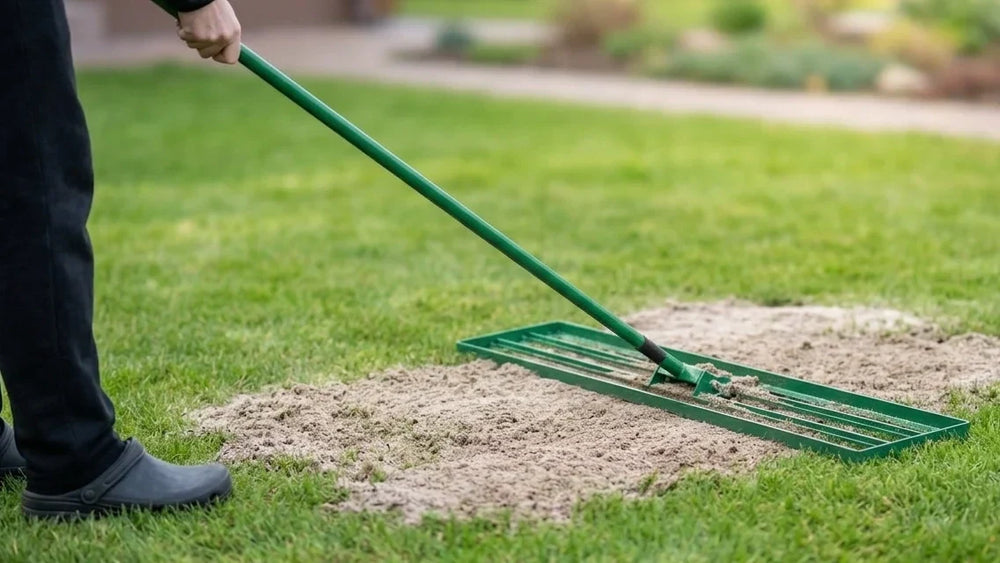
4. Level and Rake the Surface
The goal is to create a "fine tilth"—a soil surface that looks like fine breadcrumbs.
Step A: Aeration.
Use a garden fork or powered aerator to relieve soil compaction.
Step B: Leveling.
Use a wide landscaping rake to remove large stones and debris. Fill in any hollows to prevent "puddling" later on.
Step C: Firming.
"Heel in" the soil by walking over the area with small, overlapping steps to remove large air pockets.
Step D: Final Rake.
Lightly rake the surface one last time to create shallow grooves, which provide the perfect "pocket" for the seeds to settle into.
Part 3. The Professional Method: How to Sow Grass Seed Properly (Step-by-Step)
Once the soil is prepared, the actual sowing process must be executed with mathematical precision. In the UK and Europe, uneven distribution is the most common cause of a failed lawn aesthetic. Following these industrial steps will ensure a uniform, thick carpet of green.
Step 1: Check the Weather Forecast
Before opening your seed bags, consult a high-accuracy meteorological report.
Wind
Avoid sowing on windy days. Grass seed is exceptionally light; a gust of over 15 mph can blow your expensive seed into flower beds or onto the pavement.
Rain
Aim for a window with light, intermittent rain forecast for the following week. However, avoid periods where heavy "downpours" or thunderstorms are predicted, as torrential rain can wash the seed away before it takes root, leading to "pooling" and uneven patches.
Step 2: Measure and Apply the Correct Seeding Rate
Professional results require specific density. Do not "eyeball" the distribution.
New Lawns
Apply at a rate of 35g to 50g per square metre.
Overseeding
Apply at 20g to 25g per square metre.
The "Criss-Cross" Technique
Divide your total seed into two equal batches. Sow the first batch walking in North-South rows. Sow the second batch walking East-West. This creates a grid pattern that ensures 100% coverage without "bald" spots.
Step 3: Rake the Seed Lightly into the Soil
Grass seed requires "seed-to-soil contact" but also needs a small amount of light to trigger germination.
Depth
Use a light rake to work the seed into the soil to a depth of approximately 2 mm to 5 mm.
Warning
If the seed is buried deeper than 1cm, it may exhaust its energy reserves before reaching the surface. Conversely, seed left entirely on the surface is prone to drying out or being eaten by birds.
Step 4: Firm the Ground
After raking, you must ensure the seed is pressed firmly against the soil particles to facilitate moisture transfer.
Method
For large areas, use a water-filled garden roller. For domestic gardens, you can "shuffle" across the area using the "penguin walk" (small, flat-footed steps).
The Goal
You should be able to walk on the surface without leaving deep footprints, indicating a stable, firm seedbed.
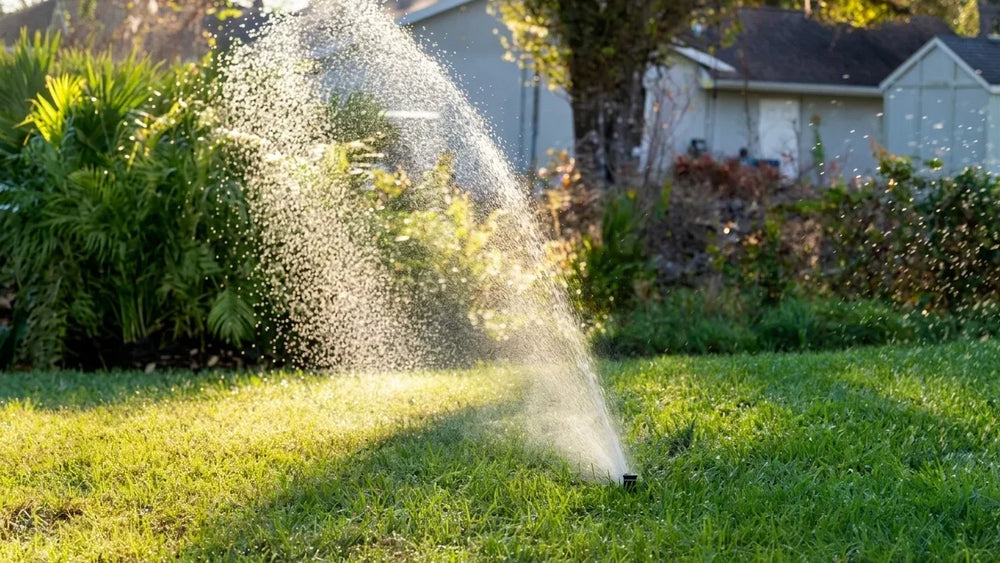
Step 5: Water Gently and Consistently
The first 14–21 days are critical. The seed must remain damp to survive the germination phase.
Setting
Use a "fine mist" setting on your hose or sprinkler. High-pressure jets will dislodge the seed and create craters in your level soil.
Frequency
If it does not rain, water for 5–10 minutes twice a day (early morning and late evening). The goal is to keep the top 1cm of soil moist, not saturated. Avoid "puddling" at all costs.
Part 4. Post-Sowing Care: Ensuring Success
The germination phase is the most critical stage. In the UK and Europe, moisture management is the primary factor in determining whether seeds thrive or fail.
1. Maintain Consistent Moisture
- Initial Saturation: Water immediately after sowing to settle the soil and activate the seed.
- Fine Mist Only: Use a fine spray setting to prevent seeds from washing away or clumping.
- The 21-Day Rule: Keep the top 1cm of soil damp for 3 weeks. This covers the full germination cycle of most UK seed mixes.
- Avoid Saturated Soil: Ensure the ground is moist but not waterlogged; standing water will "drown" the seeds and cause fungal rot.
- Environmental Factors: In windy or dry conditions, water twice daily (early morning and evening) to prevent the surface from drying out.
2. Protect the Seedbed (Traffic Control)
New seedlings are exceptionally delicate; the primary cause of early-stage failure is physical compaction or displacement.
- Root Fragility: Young roots are thin and easily crushed. Foot traffic at this stage can kill the plant before it establishes a crown.
- Restrict Access: Keep children and pets off the area entirely. Even small animals can disturb the seed-to-soil contact.
- No Heavy Loads: Do not place garden furniture, pots, or tools on the sown area, as this will lead to permanent "bald spots" and uneven soil levels.
- Duration: Restrict traffic for at least 4–6 weeks until the grass is fully established and has undergone its first mow.
3. Monitor Germination
Patience is key during the first month. Understanding the biological timeline prevents unnecessary intervention.
- Timeline: Most professional UK mixes germinate within 7–21 days. Perennial Ryegrass is typically faster, while Fescues may take longer.
- Temperature Impact: In cooler 2026 spring conditions, the process may slow down. If the soil temperature drops, germination will stall but usually resumes once warmth returns.
- Uneven Growth: Do not panic if growth appears "patchy" in the first fortnight. Grass seeds germinate at slightly different rates based on micro-depth and moisture levels; the lawn will naturally thicken over the following weeks.
4. Mow for the First Time Carefully
The first mow is a critical milestone that encourages the grass to "tiller" (spread horizontally). Typically, this occurs 3 to 6 weeks after sowing, depending on the season and growth rate.
- The Height Rule: Wait until the grass reaches a consistent height of 7cm to 8cm.
- High Setting: Set your mower blades to their highest possible setting for the first cut—aiming to leave the grass at roughly 5cm.
- The One-Third Rule: Never remove more than one-third of the grass blade in a single session. Cutting too low (scalping) shocks the young plant and weakens the root system.
- Sharp Blades: Ensure your mower blades are professionally sharpened. Dull blades will "tear" the delicate seedlings out of the ground rather than cutting them.
- Mow Only When Dry: Never mow new grass when it is wet. Damp soil is easily compacted, and wet blades lead to an uneven cut and potential fungal issues.
Leveraging the cutting-edge precision and protective features of a Mammotion robotic mower, this critical first cut becomes both effortless and exceptionally safe for your delicate new seedlings.
5. Feed and Maintain
Once established, your new lawn requires specific nutrients to sustain its vibrant green colour and structural integrity.
- Initial Feeding: After 6–8 weeks, apply a high-quality slow-release lawn fertiliser. Choose a mix balanced for the season (high Nitrogen for spring/summer or high Potassium for autumn root strength).
- Regular Mowing: Continue to mow regularly, gradually lowering the blades to your desired height over several weeks. Frequent mowing at the correct height is the "secret" to professional-grade density, as it forces the grass to grow outwards rather than just upwards.
Part 5. Avoid These Costly Blunders: 8 Common Mistakes to Dodge
Achieving a professional finish in the UK's unique climate requires discipline. To protect your investment, avoid these eight pitfalls that frequently compromise new lawn installations.
1. Sowing at the Wrong Time
Attempting to sow in the peak of a dry July or the frost of December is the most common reason for failure. Without the natural balance of mild temperatures and seasonal rain, seeds will either desiccate or rot.
2. Ignoring Soil Temperature
Air temperature is deceptive. Sowing when the soil is below 10°Cleads to dormant seeds that become easy targets for birds and fungal decay. Always use a soil thermometer for accuracy.
3. Overwatering or Letting the Soil Dry Out
Consistency is everything. Saturated soil drowns the seeds, while a single day of total dryness during the germination phase can kill the emerging sprouts instantly.
4. Spreading Seed Unevenly
Sowing by hand without a grid system results in a "clumpy" look. Always use the criss-cross technique and a calibrated spreader to ensure a seamless, high-density carpet.
5. Not Raking the Seed into the Soil
Seeds left sitting on top of the surface will dry out or be eaten. Conversely, burying them too deep prevents them from reaching the light. Aim for that "sweet spot" of 2mm to 5mm depth.
If the grass seed is spread directly onto the soil surface, it is advisable to lightly cover it with a thin layer of fine soil. This helps prevent birds from feeding on the seed and improves seed-to-soil contact, which is essential for successful germination.
6. Walking on the Lawn Too Soon
New grass has no structural integrity. Compacting the soil with footsteps in the first month crushes the delicate crowns and kills the plants before they can spread.
7. Cutting Too Early or Too Short
Mowing before the roots are anchored—or "scalping" the grass by cutting it too low—shocks the plant and can lead to widespread thinning and weed invasion.
8. Sowing Before Heavy Rain
In 2026, extreme weather events are more frequent. Sowing just before a thunderstorm or heavy downpour will result in your seeds being washed away into the drains or corners of the garden.
Frequently Asked Questions
1. How long does grass seed last if I don't use it all at once?
Approximately 18 to 24 months. To maximize how long grass seed lasts, store it in a cool, dry, and dark place in a sealed container. Be aware that the germination rate typically drops by 10% per year after the first year of storage.
2. How long do grass seeds take to grow into a mowable lawn?
Typically 6 to 8 weeks. While people often ask how long does it take for grass seed to grow when they see initial sprouts at 7–14 days, the lawn requires nearly two months for the root system to become strong enough to withstand the weight of a mower and regular foot traffic.
3. How to reseed a lawn that has become thin or patchy?
Scarify the area first to ensure seed-to-soil contact. Knowing how to reseed a lawn effectively requires removing dead thatch and moss to expose the earth. Once the soil is visible, apply your seed and top-dress lightly so the new cultivars can integrate seamlessly with the existing grass.
4. Will grass seed germinate on top of soil without being covered?
Yes, but with a significantly lower survival rate. If you wonder will grass seed germinate on top of soil, it can sprout, but the seeds are highly vulnerable to being eaten by birds or drying out in the sun. For professional results, always cover them with 2mm to 5mm of topsoil.
5. How to keep birds out of grass seed without using chemicals?
Use physical barriers or visual deterrents. To master how to keep birds out of grass seed, install weighted bird netting slightly above the ground or use reflective "scare" tape and spinning discs. These non-toxic methods protect your seed during the critical first 14 days of germination.
Conclusion
By respecting the 10°C soil temperature threshold, mastering the 21-day watering cycle, and exercising patience during the initial 6-week establishment period, you can ensure your landscape thrives even in the shifting climates of 2026.A great lawn is not grown; it is engineered through meticulous preparation and consistent aftercare. Follow these professional steps, and you will achieve a lush, resilient green space that stands the test of time.


